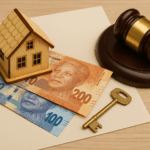

Buying or selling a home in South Africa is exciting — but if you’re not familiar with the process, it can also feel overwhelming. Between the legal requirements, municipal clearances, bank processes, and the Deeds Office, there’s a lot happening behind the scenes.
The good news? Once you understand the property transfer and conveyancing process in South Africa, you’ll feel more confident, better prepared, and able to avoid common delays.
This step-by-step guide walks you through each stage of the house transfer process — from signing the offer to final registration — and explains exactly what buyers and sellers need to do along the way.
Get Help with Property Transfer
Step 1: Signing the offer to purchase (OTP)
The journey begins with the offer to purchase — a written agreement between the buyer and seller setting out the price, conditions, and timelines of the sale. Once both parties sign, it becomes legally binding.
- Buyer’s role: Review the document carefully before signing. Make sure all conditions (such as “subject to bond approval”) are clearly stated.
- Seller’s role: Ensure you’re happy with all terms before signing. Remember — once signed, you can’t accept another offer unless your current agreement is cancelled according to its terms.
Step 2: Appointing the conveyancing attorney
In South Africa, the buyer usually chooses and pays the transferring attorney (or conveyancer). This attorney will oversee the legal transfer of the property into the buyer’s name.
- Buyer’s role: Select an experienced conveyancer, preferably one with good communication and a track record of smooth transfers.
- Seller’s role: Provide the attorney with any requested documents promptly so the process can begin without delays.
Step 3: Gathering documents and meeting FICA requirements
The attorney will request specific documents to comply with the Financial Intelligence Centre Act (FICA) and to prepare transfer papers. This typically includes:
- Certified copies of IDs or passports
- Proof of physical address
- Marriage certificates or antenuptial contracts
- Divorce orders (if applicable)
- Details of any existing home loan (for the seller)
- Compliance certificates (electrical, gas, water, beetle, if applicable)
Tip: Start gathering these documents early — missing paperwork is one of the most common causes of delay in the conveyancing process.
Step 4: Bond registration and cancellation
- If the buyer is getting a home loan: The bank appoints a bond registration attorney to register the new bond at the Deeds Office.
- If the seller has an existing bond: A bond cancellation attorney is appointed to cancel it on the day of registration.
These processes run alongside the property transfer to save time, but both require document signing and coordination between attorneys, banks, and the Deeds Office.
Step 5: Rates clearance and levy certificates
The property cannot be transferred until the municipality issues a rates clearance certificate confirming that all municipal charges — including rates, water, and electricity — are fully paid.
- Seller’s responsibility: Pay any outstanding amounts plus a few months in advance (the municipality determines how many). If the property is in a sectional title scheme or estate, a levy clearance certificate from the body corporate or HOA is also required.
- Buyer’s responsibility: None at this stage, but delays here can push back your move-in date.
Step 6: Drafting and signing transfer documents
The conveyancer prepares the legal transfer documents for both parties to sign. The buyer will also receive a statement of account for transfer duty (if applicable) and conveyancing fees.
💡 You can use our Property Transfer & Bond Cost Calculator to estimate your costs before reaching this stage.
Step 7: Lodgement at the Deeds Office
Once all documents are signed, payments made, and clearance certificates issued, the attorney lodges the transfer documents at the Deeds Office along with the bond registration and cancellation documents.
The Deeds Office checks each document for accuracy, a process that usually takes 7–10 working days.
Step 8: Registration and final handover
When the Deeds Office is satisfied, the property is officially registered in the buyer’s name. On the registration day:
- The buyer becomes the legal owner.
- The purchase price is transferred to the seller’s account.
- Keys are handed over, and the deal is complete.
How long does the property transfer process take?
The typical house transfer process in South Africa takes 8–12 weeks from signing the offer to registration.
Common causes of delays include:
- Slow municipal clearance certificate issuance
- Delays in bank bond approval or document signing
- Missing compliance or personal documents
- Backlogs at the Deeds Office
Tips for buyers and sellers to speed up the process
For buyers:
- Get your bond application started immediately after signing the OTP.
- Respond quickly to the attorney’s requests for documents.
- Pay transfer costs promptly to avoid lodgement delays.
For sellers:
- Request compliance certificates early.
- Settle municipal accounts as soon as possible.
- Gather your personal and property documents in advance.
Why understanding the conveyancing process matters
Knowing the buying property process and selling property process step-by-step means fewer surprises, less stress, and a smoother transfer. It also helps you coordinate your moving dates, finances, and any renovations with confidence.
A good conveyancing attorney won’t just process your transfer — they’ll guide you through each step, keep you updated, and make sure the deal is legally sound.
If you’re buying or selling soon, start by understanding the process, preparing your documents, and budgeting for your costs — you’ll thank yourself later.